My new eBook "Captivating Color"
As those of you who follow me on Twitter or Facebook already know, my new eBook is out. It’s called “Captivating Color - A guide to dramatic color photography”. You can get all the details about it at Digital Photography School. For the first week, we’re also giving away my eBook on light “Seeing the Light” for free, so if you’re interested in either one of the eBooks, now’s a good time to get ‘em.
New eBook - Journey Through Java
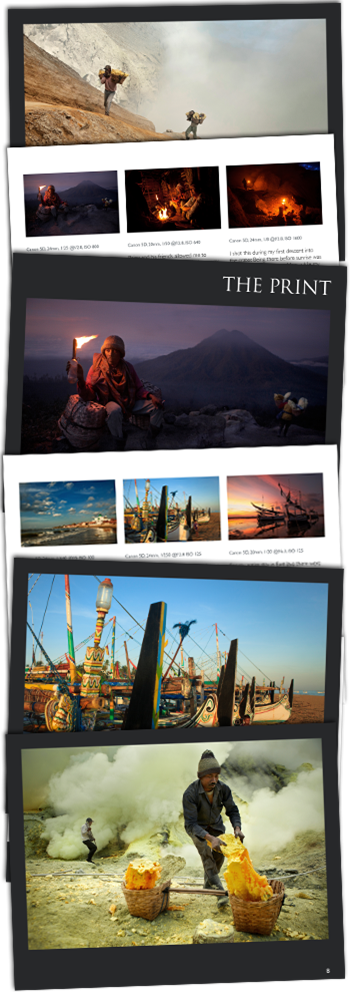
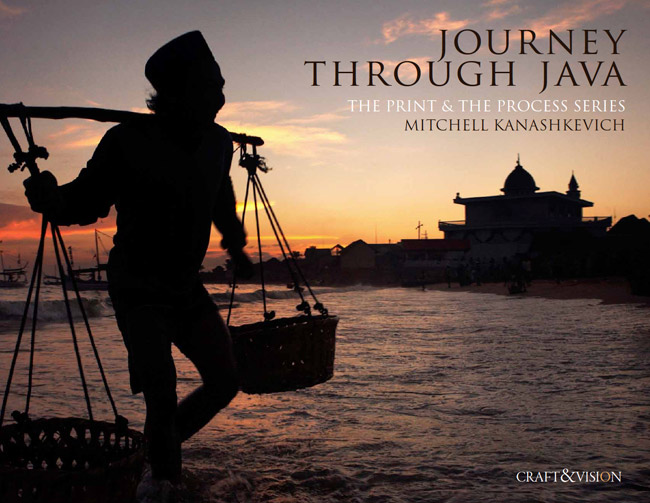 Hello good people of the Cyberworld! I have a new eBook out! As you probably gathered from the image above, it’s called “Journey through Java”. This one is a collaboration with David duChemin’s “Craft and Vision” team and it is a part of their very popular “Print and Process” series. Basically, it’s my photos and words, their structure and design.
Those of you who have been following my blog for some time are aware that I have known this duChemin fellow for a while. I think quite highly of the man, so when David approached me about doing one or possibly even a few eBooks for the “Print and Process” series, I said - “Sure thing mate!”
What really excites me about this eBook is the fact that the structure of it allowed me to focus on a specific stretch of time during my photographic journeys and as a result I was able to delve deeper into my photographic process than ever before. The eBook is fairly personal, but at the same time, the knowledge one should come away with is applicable on a very wide scale.
There’s talk about the equipment used, the technical aspects (every image has the Exif data provided) as well as composition and light. These things are all discussed in a very practical sense, as they relate to the images included in the eBook. There is a somewhat philosophical side to what I’ve written too. In this eBook I really wanted to touch on what makes a photograph more than a snapshot or an overused cliché and so I’ve devoted a whole section to the discussion of what it means to create shots that are deep, original and express what the photographer feels to the fullest.
Who is this eBook for? It is for anyone who enjoys my photography and wants to know how I go about creating my work. I do however feel that the eBook will be particularly useful for the serious amateurs who want their photos to be more than “pretty pictures” as well as those thinking of doing travel and documentary photography for a living.
The really good part for all of you strapped for cash is - it’s only $5! And if you use the promotional code JAVA4 as you check out from Paypal, you’ll get it for $4 (offer expires 11:59pm PST October 3, 2010).
To purchaseor for more info, head over to the “Craft and Vision” site HERE or click the cover shot at the top. As always, your support is really appreciated!
I’m still in Port Villa as I write this, but heading home soon. More photos and hopefully some videos to come soon.
5 Great Photography Podcasts
Whenever I do a lot of post processing work in front of the computer monitor I tend to go a little insane, by a lot I mean something like 10 hours a day for a couple of weeks straight. I’m sure that I’m not the only one on whom this has an “adverse” affect.
To minimize the “pain” I often listen to music, but I feel that a more productive thing to do is to listen to certain podcasts, specifically podcasts that relate to the industry which I am a part of. I already mentioned a few months back that I listen to a lot of tech podcasts, which are all very relevant and keep me in the loop, as far as what I need to pay attention to. Through these I know what new technological developments may either make my life easier as a photographer (and now as an eBook writer) or what new developments are game changers and need to be considered in order to keep growing. (think iPad)
Of course the great thing about Podcasts is that you can listen to them while doing other work, you absorb information and often learn new things without losing time. And so without further-a-do I want to mention 5 podcasts which are very relevant to almost anyone working in the photography industry or wanting to make a living in it. The podcasts are not ranked from best to worst, but rather alphabetically.
Note: I haven’t figured out how to link these directly to iTunes, so you’ll have to search for these podcasts within iTunes yourselves.
Matt Brandon’s “Depth of Field” is without a doubt one of my favorites. Most of his guests are professional photographers with a lot of wisdom to offer to the listener. I love his casual interviewing style and the fact that he often asks the less typical questions. Matt also doesn’t just agree and play along with the people he interviews, but frequently questions them (without coming off as overly critical) and this generates interesting discussions. In short – great stuff in this podcast!
“F-Stop Beyond” has been a solid podcast for some time now, it’s been renamed to “F-Stop Beyond – The Experience” and it seems like the quality will remain high. There are some successful, big name photographers from various parts of the industry that make appearances on this podcast. I feel that it’s always valuable listening to anyone who has succeeded at something that I’m interested in, so “F-Stop Beyond” is definitely in my iTunes library.
Brooks Jensen’s “Lenswork” podcasts are an extension of Brooks’ beautiful photographic magazine of the same name. The podcasts are monologues of Brooks’ thoughts on photography, the creative process and random things in life that offer valuable lessons to any creatives. While listening to one man speak his mind is not everyone’s cup of tea, I love listening to Brooks’ stuff. For any aspiring photographers in particular there’s a whole lot of wisdom in what the man says.
“The Candid Frame” is a podcast by Ibarionex R. Perello. It’s similar to “F-Stop Beyond” except that I feel that Ibarionex often digs a little deeper and reveals more of the inner world of the photographers he interviews. This is sometimes really fascinating and beneficial to the listener, as those who are particularly keen will learn a lot from hearing what drives and inspires some of the world’s most interesting and successful photographers.
“This Week in Photography” of “TWiP” is another favorite of mine. The podcast is hosted by Frederick Van Johnson and a panel of a few photographers (they sometimes change quite often). The focus of this show is on the photography industry, the panel discusses the latest news, developments, talks about gear and there’s usually an interesting and often very eye-opening and insightful interview with a pro photographer or someone from the industry. For those who are working in the photo industry, this podcast is an absolute must.
Well, that’s all for now folks. If you have any other great photography podcasts to suggest, please do so.
Transcending Travel – my new eBook
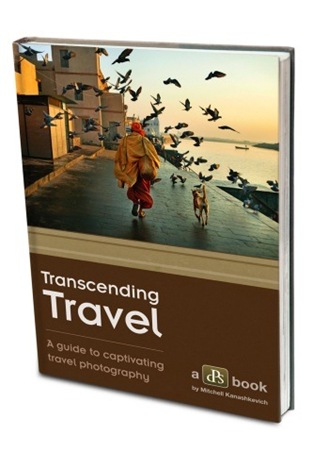 Just wanted to pass the word that my new eBook, which I did for “Digital Photography School” is out. I’ve put a lot of work into this one and I’m pretty over the moon about the fact that Darren Rowse, who is the founder of DPS (which happens to be the biggest photographic community on the web) decided to team up with me for this eBook. Darren is definitely one of the gurus of social media, he also runs the extremely useful and popular ProBlogger, it’s always an honor to be associated with people like that, who are at the top of their game.
“Transcending Travel – A Guide to Captivating Travel Photography” is ideal for beginners and intermediates, but even if you’re a seasoned shooter I hope that it can provide you with some inspiration and food for thought or just give you a look at how I do things photographically.
You can find more info HERE or by clicking on the picture above. This week there’s a 25% off special and there are also some pretty cool incentives, check out the links for more.
That’s all from me for now. More to come soon.
Been away for way too long, but here’s something to keep you busy.
Hi folks, almost a whole month has passed since my last post. Wow! Time flies!
The fact is I’ve been more busy than ever and part of the reason for that has been caused by me writing a new eBook. You’ll get more details on just what it’s about at some stage later.
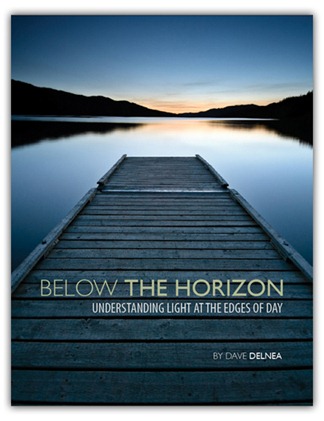
While we’re on the topic of eBooks I absolutely must direct you all to this one. It’s sorta “produced” by the wonderful David duChemin, but it’s actually written by his friend and a darn good photographer Dave Delnea.
The eBook' is titled - “Below The Horizon, Understanding Light at the Edges of Day”. Pretty self explanatory, all I can say is – it’s well worth the $5 or better yet the $4 introductory price. Photographing at the “edges of the day” is something I love doing and want to do much more of in the future, this little eBook has already given me some pretty cool ideas. Get, it learn from it, use your knowledge out in the field.
Go to David’s Blog. The “Craft and Vision” store or simply slick on the image above.
I’ll be away for a little while longer, but please be patient. Good things are coming.
Special two-for-one Sale on my eBooks
 I’m holding a SALE for both of my eBooks this week. You buy either one of them and you get the other free. So, folks, anyone who hasn’t got these yet, now’s your chance. The offer lasts from November the 7th to the 14th.
Here’s the LINK or click the image above. Just click the “buy” button, under either eBook and after payment you’ll be automatically directed to a URL from which you can download both eBooks.
To get a better idea of what the eBooks are about see my past posts.
Understanding Post - Processing and Seeing the Light.
Now to what I’ve been up to. Over the past few days I’ve driven from Belarus to Hungary. I’m on my way to Romania and that’s where I hope to meet up with a couple of fellow photogs and explore some of the country’s most picturesque regions. I have to say - it’s fascinating seeing Eastern Europe this way, the only downside is that my wife isn’t with me for this part of the journey. Due to some visa difficulties she’ll have to meet me later. In any case, I’m enjoying the trip. Traveling by car is much less exhausting than the motorcycle travel I’m used to. Heck, you can even sleep in the car. :)
Off to continue my drive. More to come soon.
On David duChemin and his eBooks
 I feel that David duChemin is one of the best photography writers out there today. Perhaps some may think we’re conspiring by praising each other on our blogs every now and then, but what can I say – I respect the man as a photographer and I absolutely love the way he writes. Is that so wrong? :)
One of the things I love most about David’s writing is that while he talks about the philosophy and theory behind photography, he always keeps things very practical. After reading David's stuff you can go out and apply the knowledge to actual, real life situations.
When I first saw the title of David's latest eBook “DRAWING THE EYE – Creating Stronger Images Through Visual Mass” I thought, “Geez that sounds a bit heavy and abstract” but I was pleasantly surprised. Well, perhaps not surprised, because I have come to expect at least a certain amount of brilliance from the man and the last eBook is certainly no exception.
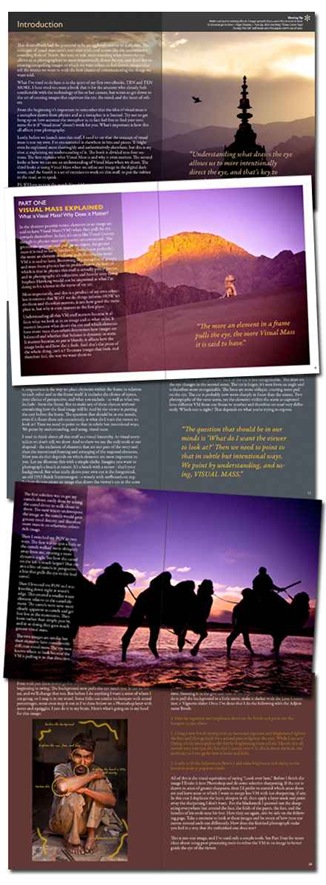
I won’t go into a detailed explanation of what the eBook is all about, I’ll simply direct you to David’s BLOG, where you can read David's own description as well as what other people are saying. I will mention this though; if you’re ready to step it up a notch and to really begin creating images with impact and some thought behind them, rather than simple snap-shots of exotic places and faces then “DRAWING THE EYE” is a must. As David says: “It’ll change the way you look at your craft”. Agreed. Even if like me you already look at your craft much the same way David does I always find that David’s eloquent and humorous writing really hammers home whatever thoughts I had in the back of my mind. He’s able to express his ideas so well and so clearly, the final message, along with the images just inspires you to push yourself a little further each time you lift the camera to your eye. For that I gotta thank the man. :)
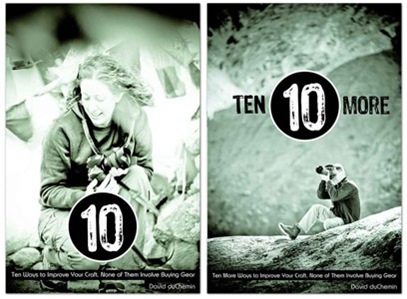
Before I go, I absolutely have to mention David’s earlier eBooks “Ten” and “Ten More” . Again, read about them by clicking on the hyperlink titles. These two eBooks are particularly useful for those in the early stages of their journey into photography, but as is the case with all of what David writes about, anyone can get a surprising bit of inspiration and food for thought from his words. The best part about it all, these eBooks are knowledge that is accessible to almost anyone around the world. At $5 a pop, the price is something that you simply can’t complain about.
You can get all of David’s eBooks RIGHT HERE.
Now a brief word about me. I’m back in Minsk, getting over an annoying cold and finishing some of Tanya’s paperwork to go to Europe. I’ll make one more trip to the region of Braslav for a week or so, finish off some logistics in Belarus and if all goes right, in early November I’ll drive towards Romania, a country, which I have been curious about for too long not to visit it.
“Seeing the Light”: Making the most of available light and minimal equipment – the eBook
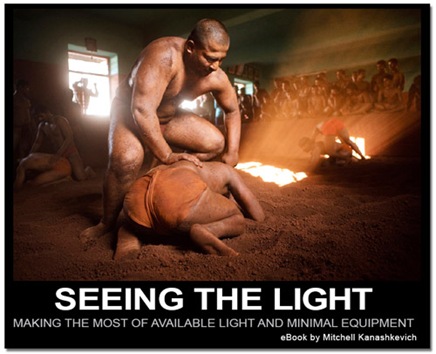 At long last here it is, my new eBook on working with light! I think the title is pretty self-explanatory. You can see some sample screen grabs below and HERE you can download the sample PDF (845kb).
You can buy it HERE or click on the title image. The price is again US$12. After payment you’ll be automatically taken to the download link.
I wanted this eBook to be useful for photographers of different levels, from those who have just begun to understand how critical light is to photography, to the more experienced individuals ready to dive into the world of artificial lighting and try new things.
The information inside should be relevant to anyone who’s passionate about light, but wants to stay compact – that includes travel and documentary photographers, wedding photographers, portrait photographers and even low-budget commercial shooters.
In short here’s what the readers will learn after going through the eBook:
- How to create “believable” looking artificial light with a single off camera flash in a softbox or with a reflector
- How to get the most out of available light – with and without the help of artificial light
- Gain a deeper understanding of natural light and how it can be used creatively, even in challenging situations
- How to “sculpt” with artificial and natural light
- How to light scenes with a flash without killing the existing atmospheric light
All you need to purchase the eBook is HERE.
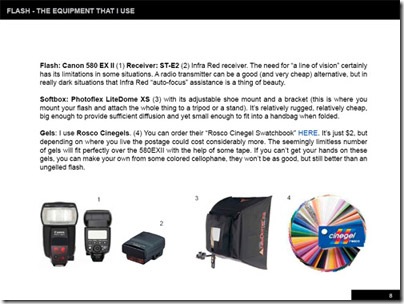 List and explanations of my equipment
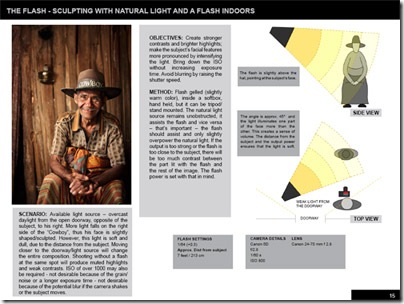 Breaking down images with descriptions and diagrams
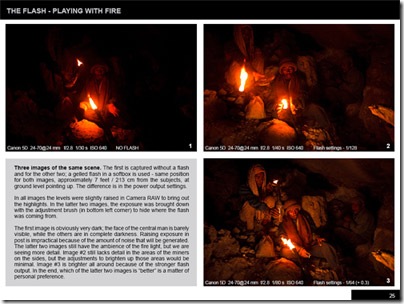 Comparison - Images taken with a flash and without
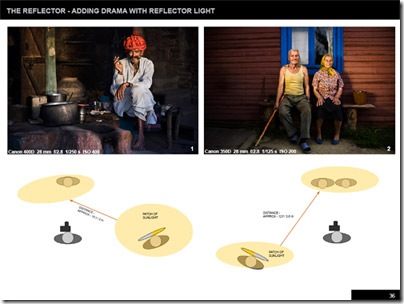 Diagrams for working with the reflector
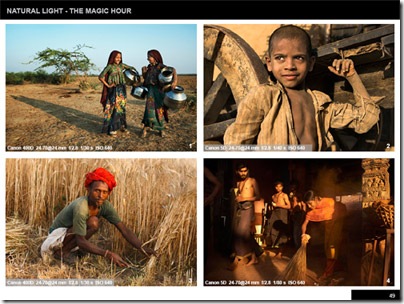 Sample images taken under natural light with complete Exif data
If you like the e-book or know photographers who may find it useful – please spread the word. As with the previous eBook all the income from this will be used for good :) – i.e. photography and more travel, which will also result in more photography and more viewing pleasure for the readers of this blog. :)
Use the bar below to spread the word.
Reflecting on our photography and looking at the “bigger picture”.
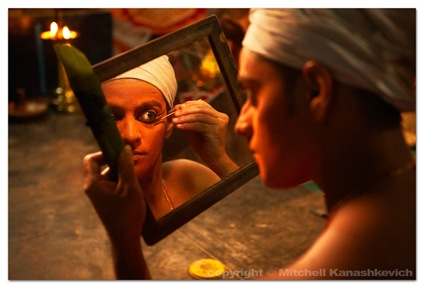 As I sit and type this blog entry in the lounge room of my wife’s parents’ apartment and wait for the “higher powers” (not supernatural ones, just ones with connections) to tell me when I can go out and photograph what I want, I realize – I haven’t shot anything meaningful since I left India. That was in March!
I’ve had an unusually long break. When I travel, which is most of the year – it’s intense photography virtually every day, but for the past six months I’ve barely lifted my camera. While I’d like to photograph non-stop, all year-round, I have come to appreciate my time away from shooting. I try to utilize this time in the best way possible. For me that means marketing my work, sorting through thousands of photos to find ones which I will submit to contests, magazines and to Getty Images. This is also the time to learn more about photography, to read blogs and to look at other people’s work.
By doing things photography related, without actually shooting I’m able to distance myself from my own work a little, and by looking at all the other photography out there, I’m able to see where my images fit in the larger scheme of things, to see what role if any my photos play in the world so saturated with imagery. The time away from shooting allows me develop a self-awareness that helps one grow and evolve as a photographer or artist.
I really like what Alexei Brotdotovich, one of the first photography theorists said in regards to evolving as a photographer. I don’t remember the quote exactly, but it was something along these lines:
“Once you develop a style and become known for a particular kind of work – turn in the other direction, stop being formulaic and re-invent yourself”.
The phrase is very idealistic and conflicts with commercially motivated things like branding and the importance of developing a particular style that sets you apart from others, but there’s wisdom here. Personally, I wouldn’t go so far as to turn in a completely different direction, but I do try to change the way I shoot and the way I approach photography every now and then, sometimes fairly dramatically.
My hope is that people will still find a common thread throughout my work, but I don’t want my photography to be consistently predictable, I don’t want the viewers to be able to pin down my images to some formula. A sort of semi-self-re-invention may even go down well with clients or editors. While they may not be pleased by a a completely off-the-wall new body of work, an element of surprise within limits might be very welcome.
An interesting “re-invention” quote that comes to mind is from one of my favorite filmmakers – Wong Kar Wai, whose visually distinct work has gained him a huge following over the years and started new industry trends. In one interview a couple of years back Wong said – “Too many people are making Wong Kar Wai films these days, I’ve got to make different kinds of films now”.
Here’s a real example of an artist who’s reached a great level of success and fame, but is thinking of changing the formula that has made him what he is. That’s inspirational. In this case the artist is not bound by his work, he is a master and not the slave of his own creations, because he isn’t afraid of creating something new and different. Sure there’s a risk and the possibility of failure, but there’s always the chance that something amazing and genius will evolve from the new approach and to me that is much more exciting than repeating the same known formula time and time again.
Hopefully, in about a week, everything will be sorted out, as far as my plans to go out into the countryside and photograph in villages. In the meantime I might just put my own thoughts into action and shoot some stuff I usually wouldn’t, right here in the city. One thing for sure - all this time off is making my head swell with ideas!
Check this blog tomorrow, if everything goes as planned, the new eBook on light will finally be released.
Chiaroscuro – Sculpting with light
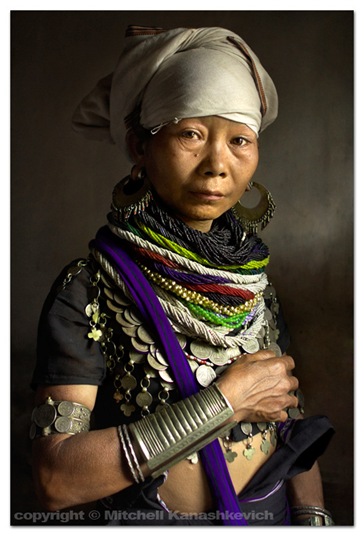 Since I’ve been pretty much consumed by all things light related recently, writing texts for my new e-book, I decided to write a post in the spirit of, you guessed it - light.
When I’m shooting, particularly when shooting portraits I have an obsession with creating a sense of volume and depth, making my photographic subjects appear sculpted, three dimensional. Turns out there has been a word for this “look”, since long before photography. The word is - “chiaroscuro”.
Now, call me an idiot, or a bad student, since I’m sure we learned this in my art history class at university, but when I heard the word from a traveling artist I befriended in Indonesia, I didn’t really know what he was on about.
Of course I put on a smart, understanding face, the first time I heard it, :) but after he used the word a second time, remarking how much he loved the presence of “chiaroscuro” in my work, (which I was showing him) I could pretend no longer :) - “chiaro-what?” He gave me a definition along the lines of what I later found later on Wikipedia:
“Chiaroscuro (Italian for light-dark) is a term in art for a contrast between light and dark. The term is usually applied to bold contrasts affecting a whole composition, but is also more technically used by artists and art historians for the use of effects representing contrasts of light, not necessarily strong, to achieve a sense of volume in modeling three-dimensional objects such as the human body.”
Today, as I was looking at some of my images, trying to explain the natural light in them and to break down into diagrams how it can be managed, I remembered the word and decided to Google it.
Caravaggio and Rembrant are two famous artists known for their mastery of “chiaroscuro”. I’m not making a revelation when I say that they’re masters for a reason. One thing is for a photographer to see the light and to position the subject in a way that will create the “chiaroscuro” look and another is to actually paint it. Every little detail is noticed and needless to say, the work of these artists is inspirational, even a few hundred years after its creation.
One important thing to note is that the masters were able to create compelling images without any of the amazing technology we have today (lighting or photographic). Many still do this there’s something to be said there. We don’t need fancy light set ups, artists have sculpted with light for hundreds of years. The first step for us as photographers is to see the light that is before us and understand how to work with it. There’s no sense in rejecting the creative opportunities that artificial light brings – that would be “counter evolutionary”, but there’s also no reason to ignore the power of natural light.
My stance is all for making the most of available light, in the literal sense of the word – any and all light available to the photographer on the move, that’s what I really want to explore in the e-book.
On a side note: I wander if any of the painters rave on about their gear or debate about which paint or brush is better, as photographers often do?
A blast from the past.
 Well, again it’s been much too long since my last post. I’ve been busy – yes. But I did have a few ideas that I wanted to share here. Unfortunately my ideas for posts often take very long to cook up and when they do, they sometimes start morphing into something completely different.
I have many things on my plate at the moment. There are several things I’m working on at once - one of them is another e-book. This one is going to be on lighting for travel photographers and those on the move. It’ll cover the use of off camera flash, reflector and of course natural light. The e-book will be similar format to “Understanding Post Processing” in that I will break down how certain images of mine were created. But there will be more examples, diagrams/illustrations of light set ups and lots of explanations. I’m pretty excited about it, but more on that in the coming days (or weeks).
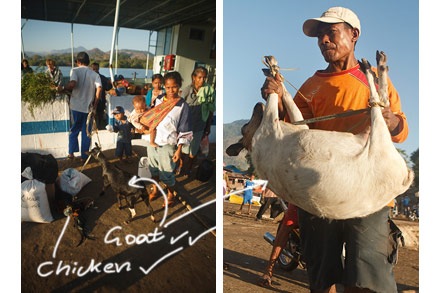
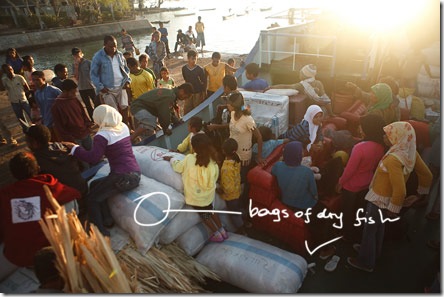
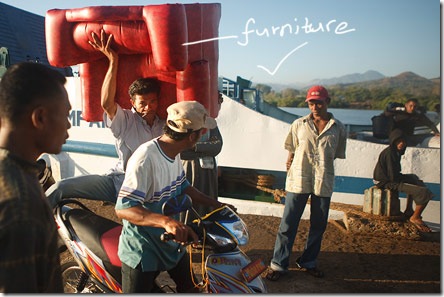
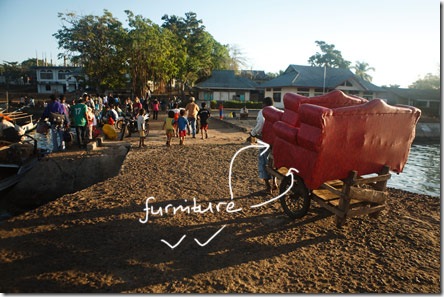
The post from the beginning of the month “Some words to aspiring travel photographers” seems to have struck a chord with many and as I was sorting through some images from Indonesia, I came across photos from that ferry I mentioned. The one packed with goats, chickens, furniture, dry fish and lovely fellow passengers who chain-smoke and continuously spit on the floor.
And so, rather than bore you with a half-thought-out blog post, I leave you with images taken on the morning of our 16 hour, overnight ferry ride from an island called Lembata to one called Alor. The photo at the top of the page is obviously of the fellow passengers who didn’t impress me much with their smoking and spitting. I guess the image doesn’t do them “justice”.
Social Media Madness!
 First of all, I want to thank all the people who bought my ebook tutorial over the past few days and thank you everyone who spread the word about it. While I am not ready to head off on a cruise to the Caribbean just yet :) the great response has certainly made the time I put into this little project worthwhile, heck I may even make another one on a different topic in the future. For those who haven’t yet got it, it will always be available through my WEBSITE and this blog (side-bar on the right).
I want to thank one person in particular – David duChemin / Pixelated Image. I met David a few years back on the ‘Travel Photographers Network’, since then we’ve corresponded over the internet and while I have never met him in person, I feel like I can really call him a friend.
If you’ve never heard of this duChemin fellow, well then I really can’t imagine where you’ve been. Over the past few months David duChemin has become one of the hottest names in photography. It seems as if on any given day he could be giving an interview on a popular photography podcast, meeting up with top photographers like Chase Jarvis or Joe McNally, or launching his BOOK at B&H, New York (probably the largest photography store in the world). The fact that amidst this busy schedule David managed to find the time to spread the word about that little ebook of mine just shows what sort of person he is. The dude is about as genuine, friendly and helpful as they get. Add those qualities to his success and you have one of the most inspirational photographers out there. So, thanks a lot David mate :) – for helping out and for being a continuous source of inspiration for God knows how many photographers now.
Now to the social media business, well it was also David duChemin who gave me the final kick up the butt to start ‘twittering’, ‘tweeting’ whatever the heck you call it. It’s not like I wasn’t aware of Twitter, I was, just as I’m also aware that it’s become much less cool, since all the ‘stars’ started using it.
I couldn’t care less about the ‘coolness’ factor. What I do see is that Twitter has turned into a really valuable tool for businesses and I can certainly see the incredible potential in it from a photographer’s perspective. David wrote a great blog post about social media stuff and photographers a while ago - “You 2.0 - Photographers and Twitter” and if you want to delve deeper into what the whole Web 2.0 thing can do for photographers it’s worth checking out Jack Holligsworth’s Site. From what Jack is promising, it will be a valuable source of information.
As far as my opinion – in short, I think Twitter is very useful for photographers marketing their work and services. It can also be an important tool, along with a blog when it comes to building your brand. But even if you aren’t into brand-building or marketing your photography, you can get a lot out of Twitter. If you ‘follow’ the right people, Twitter can be a tremendous source for learning things you never even knew were extremely useful for you – latest tech news, industry trends, free resources on the internet. If something has value, there’s a good chance that you’ll come across it on Twitter.
So yeah, I’m on it now, as some may have noticed from the ‘My Twitter’ update thingy on the side bar. You can all FOLLOW me if you like, I’m ‘mitchellkphotos’. I promise that I won’t tweet whenever I take a crap or eat something, only useful information for photographers, travelers or simply like minded folks.
Now to a somewhat different topic. As if I didn’t lust for the 5D Mk II enough already, not long ago I discovered this blog – Planet 5D.
Look around for 5 minutes and you’ll come across some amazing videos created with the camera. Some of you may be photography purists and don’t want to even touch that video button, but me, well I started off making films, so this bloody camera is making me drool. The price-tag, which is still a little ridiculous in Australia and the fact that for the same amount of money I can probably live and travel in Asia for half a year have prevented me from getting one, but man, could I do some great things with that video function :).
If anyone important from Canon ever reads this – please send me a free 5D Mk II, the stuff I’ll shoot with it will be a very worthy return for your ‘investment’. :)
Understanding Post-Processing – The Tutorial
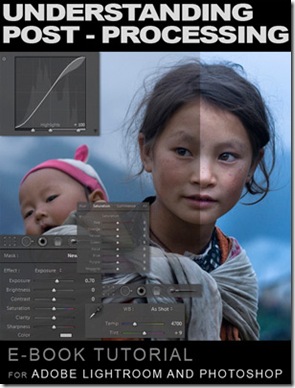 Well, it’s finally here. I’ve spent the last couple of days finishing off the tutorial that I promised what seems like a long while ago now.
The preview PDF (1.5mb) is HERE.
You can buy it HERE.
The idea behind the tutorial was born from countless e-mails where people would ask me what I do to my images in Photoshop/Lightroom. Although how I post-process images is no rocket science, it is not necessarily something that can be described briefly in an email.
And so I have come up with a fairly comprehensive e-book, which goes right to the heart of what I do to my images in post. The instructions are detailed and should enable even a beginner with some basic knowledge to achieve the same results as I, with some practice.
I think that the content of this e-book may change the workflow for many photographers. The techniques are simple enough, yet they enable you to achieve dramatic results without spending too much time on each image. To me that’s important, as much as I enjoy the post-processing, I love shooting much more. Less post-processing equals more shooting.
I mentioned some time ago how much I loved Capture One and I still do, but I have found myself using Camera RAW in Photoshop CS4 and achieving great results much, much quicker than before. Apart from some interface differences, Lightroom is identical to Camera RAW in what it does. As a result I ended up writing this e-book tutorial for Lightroom and Photoshop users. The instructions for working with the RAW files are for Lightroom (I do provide screen-grabs from Photoshop, for parts where the interface is a little different). The instructions for work that can’t be done in Lightroom and additional touch up work are for Photoshop (CS3 and after).
The e-book is priced at $US12, but I feel that it will give infinitely more value to those who use it. :)
If you like the e-book or know photographers who may find it useful - spread the word. Any income from this will be used for good :) - i.e. photography and more travel, which will also result in more photography and more viewing pleasure for the readers of this blog. :)
Everything you need to buy the e-book is HERE.
Thoughts on competing and comparing in the world of photography
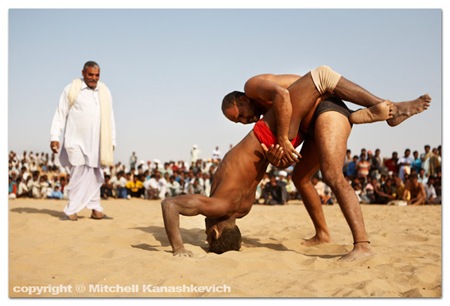 A few of my photographer friends on the internet and others who I respect, have at some stage stated that being competitive with your photography or comparing yourself to others is not something that is very useful for us photographers. I disagree.
In a world perfect for photographers, each one of us would simply follow our own creative path and not care about the market and its demands. We would create what we love, spend years on honing our skills and make a living from it. The fact that someone does what we love much better than us wouldn’t matter, because there would be enough work/money/resources for everyone who calls themselves a professional photographer.
Well, in a perfect world there wouldn’t be poverty and injustice, but our world is very, very far from perfect and the photography part of it is no different.
A few days ago I came across a blog entry titled The Sport of Business on the blog of Mark Cuban – former owner of Yahoo, now the owner of the Dallas Mavericks NBA team. Whether you like him or not, one can’t deny that Mark Cuban has been incredibly successful in his endeavors. I’m a big basketball fan and used to play pretty obsessively back in the day. I could relate some things from basketball to photography, so right away I understood where Cuban was going with his post.
Cuban compares the sport of basketball to the “sport” of business. He concludes that the sport of business is “the ultimate competition” . The dedication, the competitive nature and the hard work you have to put in, are the same in basketball and business, but the “sport” of business basically consumes your entire life.
He talks about having the edge over his competition and the “sacrifices” this involves, mentioning not watching TV, unless there is something he can learn from what’s on, not reading fiction, but rather searching the internet, newspapers and magazines for concepts that he can use in his business and “getting so jazzed about what you do, you just spent 24 hours straight working on a project and you thought it was a couple hours.”
Here’s another interesting phrase:
“Every day some stranger from anywhere in the world that you have never met is trying to come up with a way to put you out of business. To take everything you have worked your ass off for, and take it all away. If you are in a growing industry, there could be hundreds or thousands of strangers trying to figure out ways to put you out of business.”
While this quote is not directly related to photography (photographers are not necessarily consciously trying to put each other out of business), but whether we want it, like it or not, the phrase applies to many things in our world. Photography is no exception, we are competing with other photographers in our field. We compete for work, money, recognition, respect.
The demand for photography is limited. There will be only a few winners in a photographic competition, an advertising agency will usually hire only one photographer for a particular project, a magazine will only publish a limited amount of photo stories and a couple will only trust their special day to one wedding photographer.
A seasoned pro, who has been “dominant” in the industry for years may get complacent for a year or two and before he/she knows it, dozens are ready to take his/her place.
The question is: Does it make any sense to think about this stuff?
I guess it depends on the individual and as always, I can only speak about my own approach.
Do I compare myself to other photographers? Most definitely. I look at photos online, in books, in magazines all the time. If I come across work that I like, I’ll search for the photographer, go to their website, read about them, find out about their age, their experience and about what they are doing with their photography. I’m competitive and I’m very curious. I like to know where I stand. I don’t think this is bad and would even suggest to aspiring photographers to adopt this attitude.
But this comparing and competitiveness must have a purpose. It has to be done the “right” way. It’s not about simply looking at the work of talented young photographers, feeling they are so much better than you and lamenting on the whole idea for weeks. Neither is it about saying that all work except your own is rubbish.
If however you were to look at the work of a successful photographer you admire, if you were to compare where he/she is and where you are and stop to think about what the whole thing actually means, you could help your career move forward or remain at the top of the game.
When I look at the work of successful photographers, particularly my peers or those younger than me, I try to understand – What is it that has made them successful in a relatively short amount of time? What are the strong points of their work? Can I learn anything from them? If they are producing the same kind of work as I am, but are much closer to where I want to be, (creatively or financially) I want to know why. It’s surprised me how much I have learned through these comparisons.
Now about being competitive. I’m not talking about the sort of competitive, where you try to trip someone in a race to win. It’s about keeping things in perspective and driving yourself, striving for a level of greatness.
Feeling too lazy to get up and shoot on the streets early in the morning – Some 19 year old is doing it, he’ll have the shot that will sell, that will win the competition, that will give him the edge and get his photo story into the magazine. Simple as that. If you’re not doing it, you can bet that someone is and that person will be the one rewarded, not you.
Not feeling inspired enough to do something with your work? Dreading rejection from a potential client? Well, the other photographer, the one who you thought didn’t have much talent is feeling the same, but he decided to do something anyway. He emailed the magazine, called the client and now his career has moved forward, and yours hasn’t.
You compete with those who are doing the same thing as you by default, and the same goes for your competitors. To have a chance to “win” you must put forth as much effort as you can, use all the existing opportunities and create new ones. If you have the talent and did it right, you will have taken a job or a magazine slot that could have been somebody else’s. The next time things may not turn out so well.
In the end if you really compete, if you give it your all and still don’t get the result, then just like in basketball or whatever other sport, you were usually beaten by a better team/photographer, you probably just weren’t quite good enough (or at times you were not playing the same game). The good thing about photography however, is that the game doesn’t stop when you can no longer run quite as fast or jump quite as high. You can try again and keep trying until you either reach your goal or decide that it’s not worth the effort.
Ultimately the comparisons are about learning, and the competition is about getting off your butt, doing stuff with your work and living life.
And what is the other option? Photographers can shoot mediocre stuff, never compare themselves and never be aware of how mediocre that stuff is, until, if they are professionals it hits them over the head. Until a 17-year-old with an entry level DSLR takes their job.
If photography is just a hobby, enjoy it! But as far as professionals go, I feel that although some say they don’t get competitive or compare themselves, it’s simply not true. They’re doing it, even if they are not entirely aware, and as I said, I really don’t think that’s a bad thing.
I’ve been tied up with some submissions and I am quite close to finishing a new website. If all goes as planned I should have that tutorial available before the end of the month.
Facing the inevitable – Taking another look at Camera RAW in Photoshop CS4.
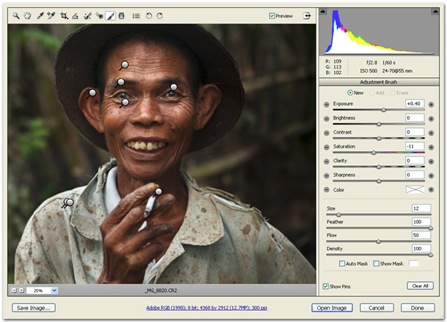 Over the last couple of weeks I’ve been playing around with Camera Raw in Adobe Photoshop CS4. The CS4 version has the local adjustments feature that Lightroom has had for quite some time now.
For whatever reason I never really fell in love with Lightroom and thus missed out on this wonderful feature. Capture One was my preferred software package. I hated knowing that the local adjustments feature existed and I wasn’t using it, but I felt that the image quality of Capture One made up for what I was missing out on.
Well, I gave the whole thing another go with Camera Raw in Adobe Photoshop CS4, I could resist no longer. True that I absolutely love Capture One, but in the end it’s just a tool and it would be stupid to get attached to it.
For files that are intended to end up as large prints, hanging in someone’s house or a gallery, Capture One is still my number one choice, but the convenience of local adjustments is too much to overlook for images that aren’t getting upsized too much. I feel that I will definitely make room for working with RAW files in Photoshop CS4.
Those who have Lightroom 2 already know how convenient it is to be able to adjust only select parts of an image, while you are still working with the RAW file. Local adjustments feature in Lightroom 2 is probably the major reason why many photographers are bypassing Photoshop all together. I still wouldn’t go so far as to stop using Photoshop, this is the only tool that allows me to do all the fine adjustments that I desire, but around 80% of the work can certainly be done in Lightroom 2 or Camera RAW in the new Photoshop.
I’ve provided a part of an image above, which is in the process of being edited in Camera RAW and it is already looking decent enough that only minor things will need to be done in Photoshop.
I am inclined towards making that PDF tutorial and I will now focus on the workflow in Camera RAW, which in its features is almost identical to Lightroom 2. There will still be some stuff that can only be done in Photoshop itself, or done more effectively in Photoshop, but most of the things can be accomplished in Lightroom.
I’m building a new website for the next couple of weeks or so, but before long I will have something up for those who are interested.
Demystifying Post-Processing (to an extent)
I said in the last post that I would put up some “before” and “after” images that would give people an insight into how much post-processing I do to my photographs, so here we go. As with the last post this isn’t a tutorial, but those who have a better than basic understanding of post-processing may get some ideas from this post. The “before” images which are unprocessed, as interpreted by “Caputre One”, they are on top and I have listed the key things which I have done with the post-processed "after" photographs. Click on each image for a closer view.
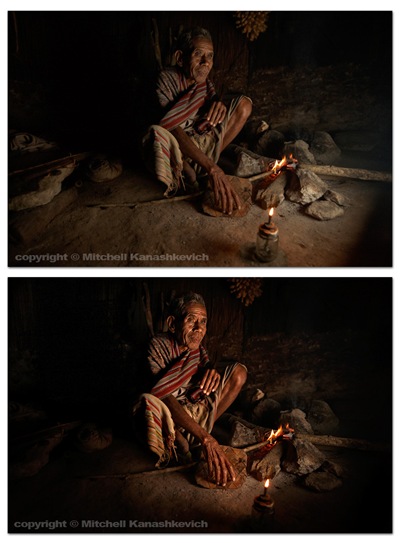
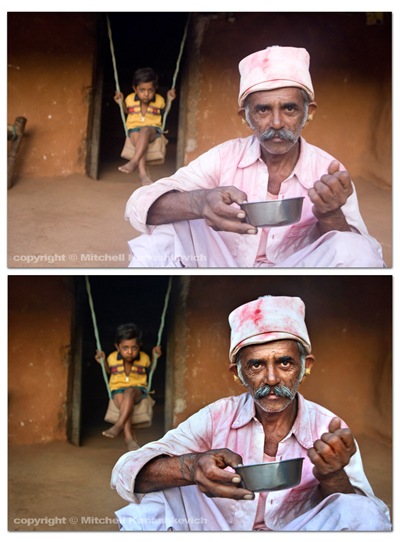
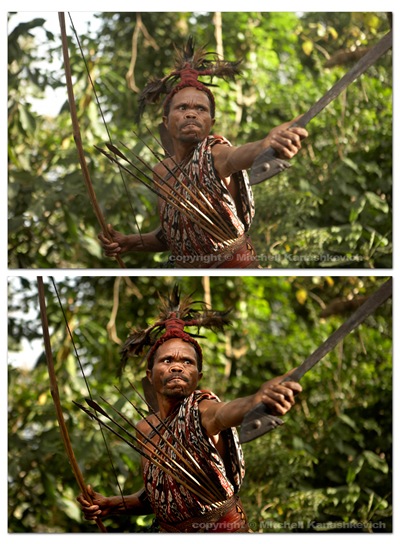
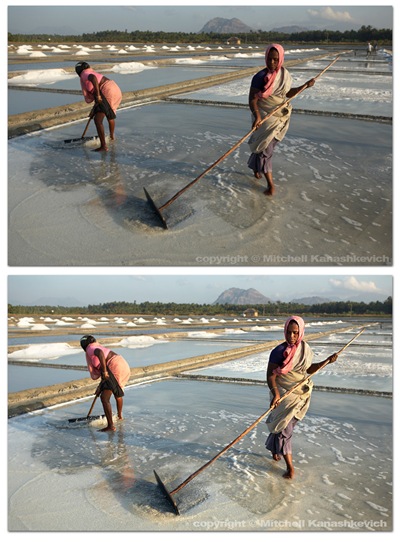 The above images have pretty much been worked on in the same way.
- Slight cropping and sometimes rotating.
- Multiple versions of the same image created at varying exposures, later made into one in Photoshop. The reason – bringing out the details in highlights and shadows.
- Curves, levels adjustment layers created, I paint inside of these wherever I feel needed, to selectively darken and lighten areas
- Shadows and highlights – to further bring out the details.
- Dodging and burning for finishing touches.
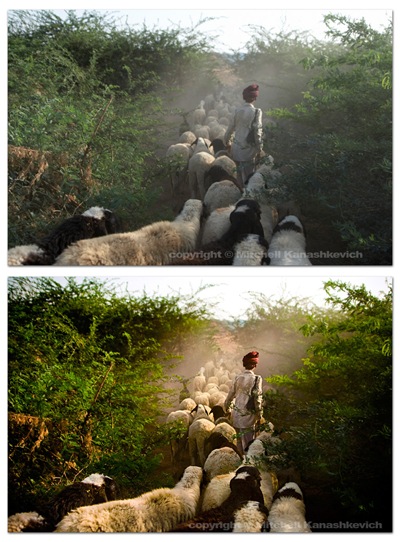 The image above had a little more done to it. On top of the previously mentioned processes I played around with the saturation and the white balance in the RAW file. More intense dodging and burning was required to add a bit of drama to the scene, to make the image look the way I remembered seeing it.
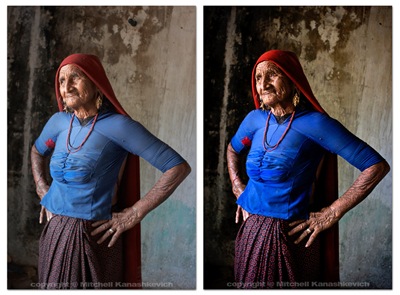 The process for the image of this grandmother was similar to the first few and I chose to clone out a little black pipe that stuck out of the wall (top/center/right). I’m not a huge fan of cloning things out and some may argue that once things start to get modified on this level, the photograph becomes less “pure”. If it’s something small that doesn’t make or break the image, but bugs me I’ll clone it out without thinking twice, if it’s something that can radically change an image I’ll usually be a bit more cautious.
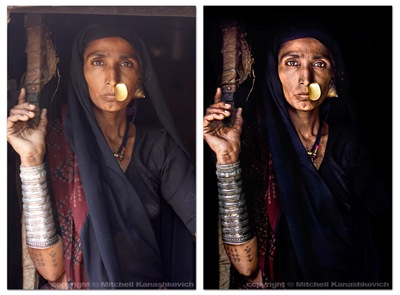 Out of the images I have presented here this one required the most work. I felt that I really needed to bump the contrasts and to dramatically darken certain parts of the photo. This sRGB conversion has a limited color range and is actually a little too dark (you loose details in the material), but you get the general idea. Same processes as stated above and just really a lot of playing around and seeing what works and what doesn’t.
That’s about it. As you can probably gather I like to keep my images looking as realistic as possible on the one side and as dramatic as possible on the other. I try to find the right balance. There are plenty of photographers who like to make their images look more dramatic, more saturated, more contrasty, to a point of surreal. There are also those who like to selectively de-saturate parts of an image, but to keep contrasts high. Lots of particular “looks” are popular these days and many people try to emulate them. Sometimes these “looks” work and sometimes they are boring, repetitive and unnecessary. I’m not really into stylizing my color shots too much. I feel that this is a bit of a fad and at times this stylization is used to mask crap light or inconsistent color. A great image will be great regardless of whether it has been realistically processed or stylized (when this is done well). A crap, stylized image may pass off as decent at first glance because it grabs you with the dramatic, surreal color, but hang it on the wall and look at it for a few days and you’ll become very bored. Maybe I am somewhat conservative - for me it’s either the dramatic, yet realistic post processing approach or if I want to do my own kind of stylizing – it’s black and white. I do quite a bit of black and white and I will post something about that in the future.
My Digital Workflow and Why I don't use Lightroom
 Ok, so I thought it might be useful to let people know how I go about working on my images after I have captured them with the camera. This is not a tutorial, just some steps that I take, a word on the software that I use and some thoughts behind why I use it.I’ll start with a statement that will likely surprise many photographers; I don’t use Lightroom, at all.
In a perfect world things would be much simpler than they are and I would absolutely love if Lightroom was my answer to everything, but it’s not. “Why?” You ask. I’ll try to make it as short as I can: I really don’t like certain textures that Adobe Camera Raw creates (this is what both Photohshop and Lightroom use to interpret RAW files) and I don’t like how it handles color. The textures often look “too computer generated”, progressions of really dark tones to a really light ones are a little too harsh, too sharp and sometimes pixelated. The colors and the tones often seem to blend with each other and the image takes on a somewhat de-toned, de-saturated look.
I feel that Capture One 4 Pro handles RAW better, it’s not perfect, but for most part I find it superior to anything else. I must note that the aim of this post is not to start a debate on which software is better; I’m simply sharing my thoughts. If you want to see for yourself, download a trial of the current Capture One, experiment and see if it’s for you. I came across the software after being unhappy with Lightroom’s and Photoshop’s handling of RAW files that I wanted to make into rather large .jpegs, which would later be turned into 20X30 inch prints. Sometimes it takes a large print to see whether an image holds up or not in terms of quality. I could create large prints from images made with Lightroom and I have done it, but boy did that task take a lot of unnecessary time.
And so as a result of living in a not so perfect world of computers I use a combination of programs to achieve my goals:
iView, (now Microsoft Expression Media 2) – to sort through the files and catalog them.
Capture One 4 Pro – for conversions from RAW to jpegs.
Photoshop (still CS3, although that may change soon) – for in-depth editing of images.
Adobe Bridge – for keywording and descpriptions.
 After I download my day’s shoot onto the computer I create a “catalog” in Expression Media 2 and import all the photos there. Then comes the selection process. In Expression Media 2 you can assign colors to images. I usually only assign colors to the images I want to keep – green, basically every image which I think is pretty decent is marked green. There is an option that lets you sort images by color and by the end of my selection I choose this option to bring up all the images that actually don’t have a color under them – these go directly to the recycle bin. I look through the decent, green images again, pick some standouts and assign another color to them. If I want to make the selection even tighter I simply repeat the steps and use a new color. I love Expression Media 2 because it’s very simple, fast and it doesn’t eat up HDD space with its catalogs.
 Next comes the RAW to JPEG conversion. All the images that I want to work on are downloaded into a temporary folder. This folder is opened in Capture One. The software has a great option called “variables”, it let’s you create multiple copies of an image and allows you to compare these copies/variables side by side. For quite some time I have been doing a thing that some people on the net call HDR portraiture – all this means is that I create multiple images from a single RAW file. I do this because the tonal range of all digital SLRs is still somewhat limited – if you shoot a person against a bright sky, either the person will be really underexposed (very dark) or the sky will be really overexposed (very bright). I shoot such situations in a particular way, you could say that I expose in the middle, so the person is not too dark and the sky is not too bright. When I bring this RAW file up in Capture One I will usually make three images from it – one underexposed, one overexposed and one neutral. That’s basically what I use Capture One for.
These three files are opened in Photoshop and are “blended” into a single image that now has a greater tonal range than anything the camera can produce by itself. I use curves or levels adjustment layers, as well as dodging and burning tools to apply the finishing touches.
The finished images are key-worded and described in Bridge and the RAW files are sometimes copied from the temporary directory into a permanent one, which is basically a backup of all the images that I consider good.
That’s about it. As I mentioned this is not a tutorial, I haven’t gone into much detail on anything, but these are the steps that I go through. Perhaps, if people are interested, at some stage I will release an in-depth tutorial on post-processing images with techniques that can also be used with Lightroom and Photoshop. I don’t want to just post something “half-baked”; I’m against formulas and quick fixes and all for in-depth understanding of each process.
One question I get asked quite often is: “How much post-processing do you do? How do you achieve a particular look in an image?” I guess this post has shed some insight on how I achieve the “particular look”. In the next post I’ll share some "before" and "after" images that will give a better idea of just how much or how little post-processing I do.
